
Get started with Clang Power Tools

Clang Power Tools is a powerful suite of tools designed to help developers write, debug, and optimize their code quickly and easily. With Clang Power Tools, developers can utilize advanced language features and compiler optimizers to get the most out of their code.
This article will provide an introduction to the tools and resources available in Clang Power Tools, as well as tips and tricks for getting the most out of them.
What we need to get started
Before using Clang Power Tools, it's important to take the time to do some prep work and ensure everything is set-up and ready to go.
- Be sure you have at least one of the following Visual Studio editions:
- ▪ 2022
- ▪ 2019
- ▪ 2017
💡 Visual Studio 2015 is no longer actively supported. You can download and use Clang Power Tools v7.5, our last version to support that environment.
-
If you are running Windows 10 then you can easily jump on the next step. Otherwise, be sure you have PowerShell 5.1 installed.
Alternatively, you can use just PowerShell 7 with Clang Power Tools, but you will need to activate it from within the extension after installing it. Note that this is an extra step that must be taken in order to use PowerShell 7 with Clang Power Tools.
Clang Power Tools is built by Advanced Installer, a powerful Windows Installer Packaging Tool for developers. Our team created and continues to maintain this free, open-source Visual Studio extension to help C++ developers modernize their codebases using LLVM's static analysis tools and the CppCoreGuidelines.
Installing Clang Power Tools
-
Open Visual Studio and select the Extensions option from the top menu.
-
Choose Manage Extensions from the drop-down menu.
💡 For Visual Studio 2017 you will find Manage Extensions under the Tools option.
-
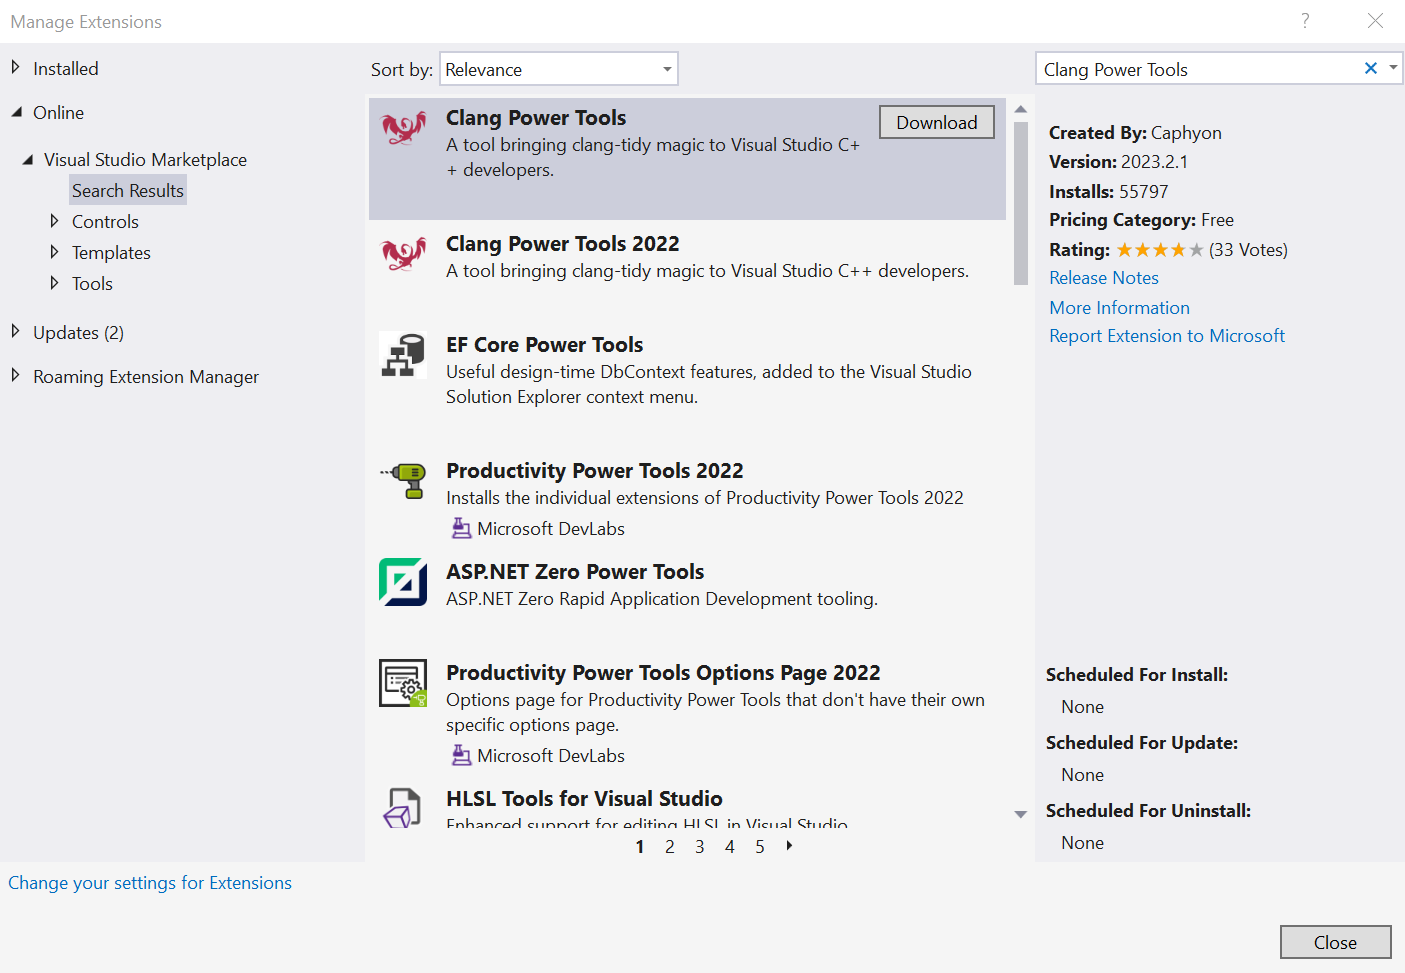
In the new window select Online from the left panel and search for Clang Power Tools in the top right corner search box.
You will see two products with the same name, but there is no difference between Clang Power Tools and Clang Power Tools 2022, both are designed to target Visual Studio 2017-2022. You are free to choose which one to install.
-
Press the Download button and close Visual Studio to start the installation process.
💡 In order to begin the installation, all the Visual Studio instances must be closed.
-
Press Modify and wait for the installation process to finish.
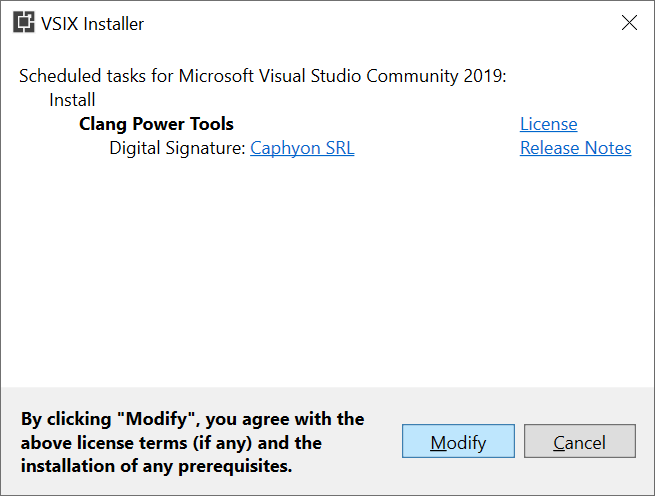
After the installation, reopen Visual Studio code editor and Clang Power Tools will come alive.
💡 Clang Power Tools can also be downloaded from the Visual Studio Marketplace. Once the download is complete simply run the ClangPowerTools.visx file and continue with Step 5 to complete the installation.
Running your first command
Clang Power Tools is created to offer the best experience out of the box. That being said, after the short requirements set-up, the extension comes with a predefined set of options activated and is ready to run. Here is all you need to do:
-
If you don't have at least PowerShell 5.1 installed or a newer version you can use PowerShell 7 (activate it from Settings ➔ Compile ➔ PowerShell 7)
-
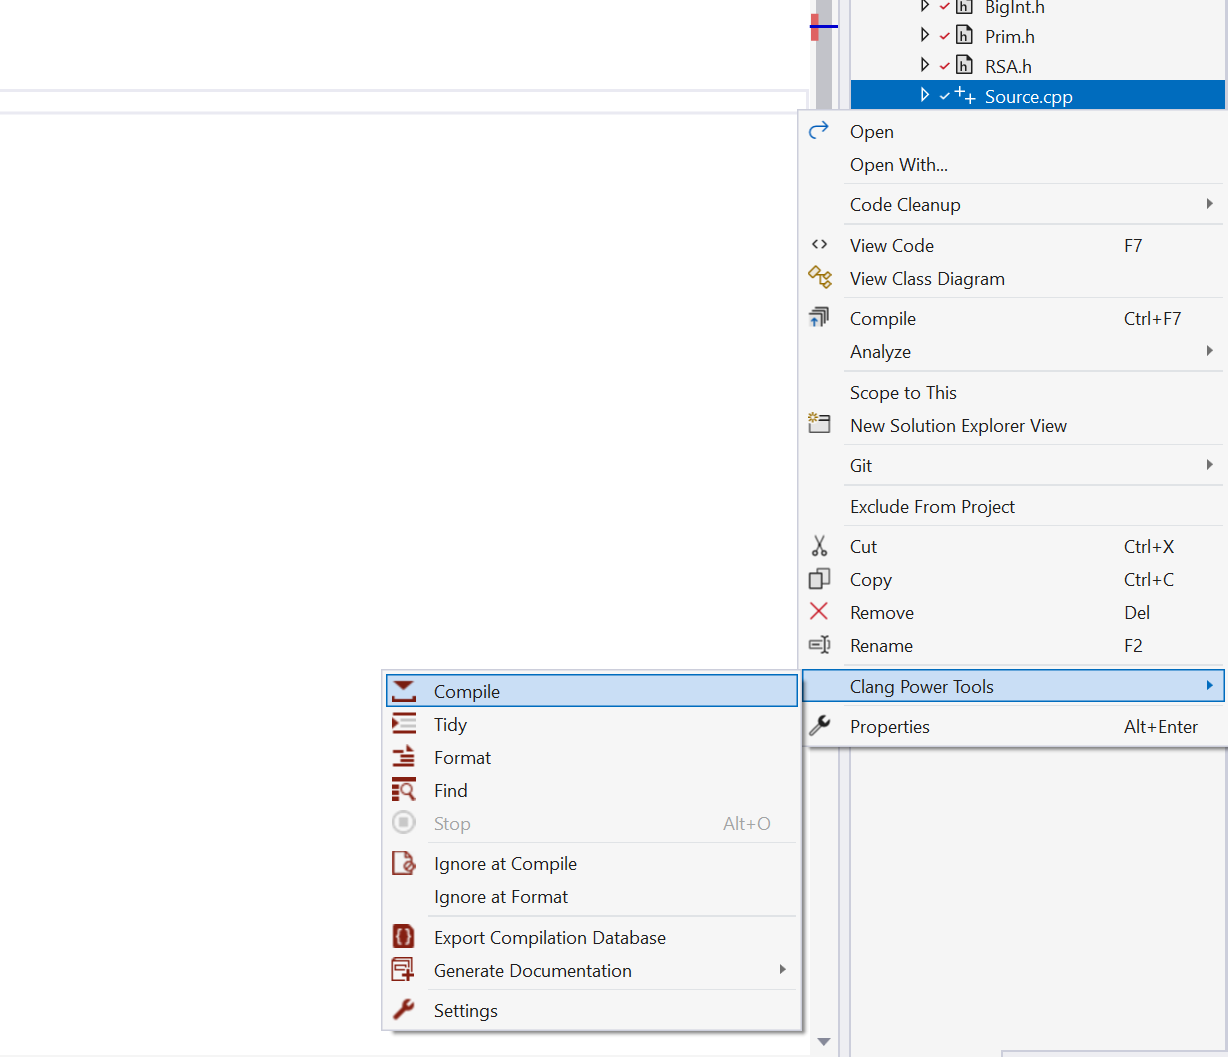
Execute one of the commands from Clang Power Tools Toolbar or Context Menu on a .cpp file. Let’s choose Clang Compile as an example.

-
After the command was pressed, keep the eyes on the Visual Studio Output window for more information from the Clang compiler.
-
When the command is finished, all the error messages found in your code will be revealed in the Error List.

Closing words
Now you know how to launch the main commands with the default configuration. Also, you made the first steps into the Clang compile experience, and all of this was possible with the help of Clang Power Tools.
This is just the beginning of your journey with Clang Power Tools. Many other features are waiting to be discovered, and many more will come in the near feature.
If you have any suggestion or feedback report, we highly encourage you to let us know on our GitHub. Until then, happy coding!
Author History
- Marina Rusu - February 23, 2023
- Enache Ionut - April 9, 2020